Why I’m happy I became a scuba instructor…

Why am I happy I became an instructor? I made my first scuba dive in 1977. I became an instructor in 2017… some might say it was about time ๐Ÿ™‚

I became interested in scuba diving at a very young age… I was about 10 years old when I discovered the old television series Sea Hunt with Lloyd Bridges. I used to rush home from school every day to watch re-runs (Sea Hunt actually started filming before I was born and was in re-runs by the time I discovered it). Living in a small Texas city at that time, far from the ocean, I was fascinated.

Watching Sea Hunt had me looking for books on diving at the library.ย  I’ve had a life-long love of reading and I’m prone to look for a book whenever I’m curious about something. One of the first books I found was “Silent World” by Jacques Cousteau who became one of my early inspirations. When I was 13 and just out of 7th grade I was in Corpus Christi with my father. As we were driving I saw my first dive shop (Copelands one of the oldest dive shops in Texas I later discovered) and convinced him to stop. I used money I had earned working in my dad’s warehouse that summer to buy a set of snorkeling gear. It was Scubapro and the first quality set I owned. Much better than the cheap plastic drugstore variety! When I returned home to Bryan I found a “skin diving” course being offered at the municipal pool and talked my mom into taking me. That first scuba dive happened later in Virginia, my first year in the Navy.

Looking back at my IDC (Instructor Development Course) and time I spent at Dive Oahu in Hawaii, I have to admit it was a hectic period of time.ย  We started with Assistant Instructor the first half of the course and then moved on too Instructor which was more practice!ย  Successful completion of the course requires an in-depth understanding of everything! The PADI teaching method, standards and practices, dive theory, rescue, practical application and demonstration of diving skills. It was an intense experience to say the least!

I have to say even though I’ve been diving a long time, it was a bit challenging at times.ย  I remember one day in particular that was not a fun day!ย  We did a beach entry through what I considered (still adjusting to Hawaii and I’m not as young as I once was) to be fairly heavy surf. This was followed by a surface swim out a good 300 yards.ย  We presented the skills we’d been assigned to teach. We were doing makeups so we had 4 skills in all to present. Some at the surface and some that we taught underwater. Everyone took turns. We had a bit of current that wanted to push us south and there was surge to deal with as well. We were in the water a good 3 hours (obviously not underwater the whole time).

After we’d all finished teaching our assigned skills, then it was time for rescue practice which we practiced on every open water training dive we did throughout the IDC. Rescue practice consists of keeping someone afloat while removing all of their equipment and your own, all the while doing rescue breaths every 5 seconds.ย  Did I mention there was a current?

By the time we headed back in I was exhausted and frankly not in the best of moods… then out of the blue, I came face to face with a sea turtle! He went right and I went left as we passed each other. At the moment I saw him my mood was lifted and I thought to myself how cool that was! ๐Ÿ™‚

My biggest concern and probably a big reason why I never became an instructor all these years was that I might somehow lose that feeling… the feeling of joy, the feeling of adventure, that feeling I get when I see something amazing, whether it’s a new nudibranch species, or a shark, or a turtle… Those who dive know that feeling ๐Ÿ™‚

Why am I happy that I became an instructor? Because now I get to share that feeling with others and THAT is even cooler! ๐Ÿ™‚

Catching up…

I realize that it’s been several months now since I last posted. Being a full-time college student has frankly been a bit of a bear at times ๐Ÿ˜€ I’ve also still taught the occasional scuba course and of course I still want to do some fun diving ๐Ÿ™‚ So, picking up where I left off….

During the 5 week break from school I made 23 dives. A mixture of shore and boat dives. I’ve made close to a 160 dives (my largest single year total to date) in Guam since moving here last year. That total would have been much higher if I’d not gone back to school last August. I will get to writing about the diving in Guam here eventually ๐Ÿ™‚

I went back to school on January 23rd. On February 16th I made my last dive with Colin Ross. We did one of my favorite dives here, the Kitsugawa Maru, a WW II Japanese wreck in Apra Harbor. Colin was one of my first students in Guam. He and his wife Virginia did their Open Water with me last year. Colin went on to do Advanced Open Water, Enriched Air, and Wreck Diver. He, along with Joe Seremba and Jayson Trucksees, was one of my regular dive buddies here for fun dives last year when I wasn’t busy with school or teaching. Colin’s in Navy Dive School in Florida now.

I went to the Philippines and dived Puerto Galera during spring break the last week of March. My friend Joe Seremba from here on Guam came along. Joe has done his Open Water, Advanced Open Water, and Enriched Air with me. We met my friend Ron Brannan from California who was on his annual dive trip to the Philippines. Ron and I have been diving together in the Philippines for a few years now. We met in 2016. Last year he was my first “official” student after becoming an instructor. Ron completed his Advanced Open Water and Enriched Air with me last February. He’d done over 200 dives by the time he got around to doing Advanced Open Water. He figured it was about time ๐Ÿ˜‰ It had been over a year since I’d last dived in the Philippines and I discovered how much I missed it! We stayed at AAA again and dived with Frontier Scuba.

I’ve not done a lot of teaching this year (too busy with school) but I have worked in a few classes. So far this year I’ve done only six certifications… Cynthia Mulliner earned her Advanced Open Water cert and Kasia Merline and Joe Seremba both earned Enriched Air certs. They were all certified in April. In May, Amanda and Daniel Perez who were visiting Guam from Virginia (actually Amanda was here for work and Daniel came out to spend some time with her) completed their Open Water certs. Anne Freeby completed the requirements for Scuba Diver.

On May 11th before heading over to meet Amanda, Daniel, and Anne at MDA I participated in the 3rd Annual Merizo Pier Project. This is an annual event that conducts an underwater cleanup of the reef around the Merizo Pier here on Guam. Jayson Trucksess, who did his Advanced Open Water and Enriched Air courses with me last year was my buddy. We were there early and were part of the first group of divers to hit the water. It was my first time diving at Merizo and it was a nice dive. Plenty of coral and fish. We recovered the usual assortment of fishing line, cans, bottles, and other assorted trash that we see all too often these days.

After a busy weekend, I had my last week of classes at UOG. Final exams were the 20th to the 22nd. My second semester back in school ended up being a bit harder. I struggled early with Biology I. Turns out there is a fair amount of chemistry that is part of the study of biology. Not having had high school chemistry (which would have been over 40 years ago anyway) hurt. In the end I ended up with a C. On the bright side I made an A in World Regional Geography (I’ve added a Geography minor to my degree plan) and an A+ in Marine Biology so it wasn’t all bad ๐Ÿ™‚

After finishing the semester I made my second trip this year to the Philippines with my friend Joe Seremba. We arrived in Olongapo on May 24th and spent a week diving Subic Bay. My last time diving Subic I gave Arizona a shot but I’m back diving with Johan’s again. Johan has built a brand-new resort just down the beach from his previous resort on Baloy Long Beach. I do like Johan’s a lot. I like the atmosphere and the people there ๐Ÿ™‚ My past several trips to Subic I’ve stayed at Coffee Shop Rooftop Hotel in Barangay Barretto which is across the street from Arizona Dive Resort. They were full this time (first time that has ever happened) and we ended up staying at Arizona for 2 nights. This was my first time staying at Arizona and frankly I thought the rooms were overpriced. I’ve stayed in nicer places in the area for much less money. Having said that, I still like their restaurant and have nothing bad to say about their dive operation.

We arrived back on Guam on June 2nd. On the evening of June 3rd I went to the Navy Hospital here on Guam when I started feeling chest and back pain with numbness radiating down my left arm. It was no where near as bad as what I felt in Singapore two and a half years ago but it felt enough like it that I decided better safe than sorry.

They treated it as a heart attack and administered drugs accordingly. Symptoms (pain in chest and back, pain and numbness radiating down left arm, shortness of breath) were relieved fairly quickly. The symptoms are very similar for heart attack and angina. We thought initially when I recovered so quickly, that it wasn’t a heart attack. That turned out not to be the case.

They did a blood test for cardiac-specific troponin levels which is used to detect injury to the heart muscle. Initially it was negative but they kept me for 3 hours so they could run the test again as it can take that long to show up in a blood test after initial symptoms appear. When the second test came back positive I was kept in the hospital.

My echocardiogram showed a reduction in my ejection fraction. Ejection fraction refers to how well my heart is pumping blood. Other than that my heart continues to more or less function normally. I have a normal EKG and am not suffering from any kind of irregular heartbeat. I’ve never had high blood pressure.

I was kept in the hospital until Thursday morning when they let me go home. I had a follow-up last week on Tuesday with my Primary Care Manager. I met with my new cardiologist here on Guam this week on Monday. I’m scheduled for an angiogram next week and we’ll be able to see exactly what is going on. The damage was relatively minor based on the lab results. Depending on what the angiogram shows I may be cleared to dive as soon as next week… Just have to wait and see at this point.

In the meantime I’m staying at home and taking it easy. I decided I would work on my blog a bit since it’s been so long ๐Ÿ™‚ I have a post on choosing a BCD (which I mentioned in my last blog post back in January) mostly written (it’s been mostly written for 6 months ๐Ÿ˜€ ). I may work on some more posts in my “Choosing Equipment” series and I do need to write about some of the diving on Guam ๐Ÿ™‚

Until next time…

Choosing Fins and Booties

I know it’s been a few months since I posted…. I’m going to finish up here and then in my next post I’ll write about what I’ve been doing ๐Ÿ™‚

As I’ve mentioned in my earlier blog posts on choosing equipment, I’m writing these pieces mainly for those who are new to diving. They reflect my opinion and experience. I always suggest that you seek advice from your instructor as they may have a different and maybe a better way than I do ๐Ÿ™‚

TYPES

Fins are basically divided up into two types… full foot, that you put on like a slip-on shoe, and open heel fins with straps. There are several variations of these two types.ย There are bladed fins with different materials to channel the water when kicking. Those may be stiff or flexible, or somewhere in between. There are versions of the standard blade fin that are split, and another version which has vents to channel water. There are shorter fins designed for snorkeling and very long fins used in free-diving.

FULL-FOOT

Full-foot fins tend to be lighter in weight. Many are designed for snorkeling so make sure the ones you choose are heavy enough to do the job. Short and very lightweight fins that are adequate for snorkeling will not provide enough thrust for scuba diving. Some divers prefer full-foot fins when diving from a boat or a sandy beach in tropical water. These fins are worn with bare feet or thin socks. In areas where the water is colder they would not be suitable as booties would be required for warmth. Booties are also a requirement for many beach entries especially across rocks or coral. I have a few friends who use free diving fins (a whole different animal from standard snorkeling fins) when boat diving and swear by them.ย Freediving fins have a larger surface area which gives them more thrust. This larger surface area is the result of being much longer giving them a “snap” as the diver kicks which generates even more power.

A good quality full-foot fin will have a solid, rigid sole which is more efficient in transferring energy from the foot to the blade of the fin.ย A full-foot fin should have enough space to insert your pinky in between your heel and the back of the foot pocket. If you can’t get your pinky in, then the fins are likely too tight. To much space and the fin will be too loose. These type fins will definitely be more slippery in the water and feel looser, so keep that in mind. Make sure there are no spots digging into your foot. Sit on a stool or chair and flex your feet. If your toes are sticking out make sure they’re not squeezed or that the top edge is rubbing. If your feet are prone to cramping or blistering, this may not be the best choice.

Aqualung Express Full-Foot Fin

OPEN HEEL

Most scuba divers use open heel fins with straps that are designed to be worn with booties or boots. These fins are available in a variety of materials and versions. Materials include, monoprene, polyprophlene, thermoplastic, and of course rubber. Some fins will combine these materials. The main variation in design will be blade fins (with a variety of stiffness), split fins, and vented fins. Most new divers (and many experienced ones) stick with the standard blade fin.

Fins can have differences in flexibility. Stiff fins are generally considered superior for frog kicking and maneuverability. They work well for backing up or for maneuvers like the helicopter turn. For a standard flutter kick though, the added resistance can bring on fatigue much quicker for those who are not conditioned for it. A more flexible fin is easier to kick with and is less tiring.

Split fins have a section removed from the center, thus “splitting the fin”. The theory behind split fins is that on the down stroke (the power stroke) the fin creates a “vortex” adding to forward propulsion. On the upstroke, which doesn’t provide as much power anyway, resistance is lowered by allowing water to flow through the split. It’s a popular design for divers who have ankle or knee problems or who cramp easily. Easier kicking can also translate into better air consumption.

The primary con with split fins and very flexible fins, is that they do not provide as much propulsion as the stiffer blade fins. They lack the power in dealing with current that a stiffer fin provides. They are not as effective in frog kicking, backing up, or performing maneuvers like helicopter turns. The stiffer fin is superior for these maneuvers.

A popular fin for tech divers, cave divers, wreck divers, and underwater photographers is a version of the bladed fin sometimes called turtle fins. These fins tend to be a bit shorter and wider than a standard bladed fin. They are stiff and have vents that allow water to pass through reducing drag and increasing efficiency. They require strong legs, especially for the flutter kick. They will move you through the water quickly and efficiently. These fins are much more effective at fighting current than lesser versions. They are superior for maneuverability as well. Versions include the Aqualung Rocket Fin, Apeks RK3, ScubaPro Jet Fin, and OMS Slipstreams.

HEEL STRAPS

Open heel fins should have easy to use heel straps. No one wants to struggle getting fins on and off. This can be an issue making certain entries, especially through surf when you are timing the waves during your entry and when you’ve waded out far enough need to put your fins on quickly. When getting out of the water after a boat dive you want to be able to easily and quickly remove your fins if you are climbing a ladder. Getting your fins off quickly so you can climb out is especially important when conditions are rough.

One choice for the strap is the traditional stainless steel buckle. The flat, rubber strap is adjusted for comfort and to keep the fin on your foot. They are less expensive, but can sometimes be a struggle to get on and off in the water as there is not a lot of “stretch” in the rubber strap. Another possible choice are straps with releasable buckles. I’m familiar with two versions. One allows the buckle to fold back, loosening the strap. The other unbuckles the strap completely.ย Only do this on one side getting out of the water. You don’t want to lose your strap!ย  The last choice I will discuss is a flexible strap that is made from material that will snug your fin around your heel, but can easily stretch to allow easy removal. These straps are made from either stainless steel spring, or rubber bungee cord. I personally use spring straps and prefer them for their toughness and ease of use. Aftermarket spring straps are available for many major brands. I purchased spring straps for my Mares Superchannel Fins while my OMS Slipstreams came with spring straps already installed.

Universal Spring Straps

BOOTIES

Booties or drysuit boots are pretty much a necessity for most shore diving or when diving in colder waters. Booties are typically made of neoprene with with hard rubber soles. Felt bottoms which can offer additional traction when crossing slippery rocks are also available. The best booties for you will depend on conditions. Temperature, shore or boat entries and if shore entries the type of shore. Sand or slippery rocks. Thickness will depend on water temperature and will typically be similar to your wetsuit. Tropical diving is usually 3 mm. For diving in tropical waters from a boat, low top booties will work fine. Many people prefer low tops for warm water diving in general. My personal preference that will meet most conditions here in Guam (and other tropical destinations) is felt bottoms with high tops. Shore entries here are often across slippery rocks or walking across the top of a reef. I like the extra grip of felt bottoms. I like the high tops for the extra protection for my ankles in case I step in a hole. Another thing to look for is good protection on the sides, heel, and top of the foot. A sole that will give protection adequate for the conditions you’re diving in (ie… rocky entry). A rubberized covering of the neoprene around the heel gives protection for the heel strap, and over the toes and the top of the foot will give extra protection for the foot when walking during a shore entry and the top of the foot when it’s inside the foot pocket of the fin. You get what you pay for. Without the extra protection I’ve seen holes worn into booties in less than a year from just normal wear. It generally pays to get quality in the long run.

CONCLUSION

I hope I’ve provided some things to think about when choosing equipment. I’m sure that I’ve missed a few things ๐Ÿ™‚ย  Again, as I mentioned in the beginning, I always suggest consulting with your instructor or your local dive shop as well. They very well may have other things to consider that I may have missed. Experienced divers can have strong opinions about equipment and it’s always good to hear their reasoning. Being open to new knowledge is a good thing!

Choosing a Snorkel

This is the second installment of my series on choosing equipment. I’m writing this series more for the beginning diver. As always I recommend that checking with your instructor is a good idea (they may not agree with all my ideas ๐Ÿ˜‰ ). You’ll find that the retail staff at your local dive shop can also be a great help when purchasing dive gear. Having some information to start with though can help provide a basis for discussion. The first installment, if you missed it, was on “Choosing a Mask”. This time I’m going to write about snorkels.

When I was 12 I purchased my first set of really good quality snorkeling equipment from Copeland’s in Corpus Christi, Texas. (in case y’all were wondering that would have been in 1970 ๐Ÿ˜‰ ). Copeland’s was the first dive shop I ever went in. My father was working in Corpus Christi and I was visiting him for the summer. When I saw the dive shop I begged him to stop. (I’d already became enamored of diving from watching Sea Hunt re-runs and The Undersea World of Jacques Cousteau on TV). I walked out with a set of ScubaPro snorkeling equipment ๐Ÿ™‚ The snorkel, of course, was the simple J type. With a little practice, it did the job quite well and it would actually be a few decades before I used any other type!

A snorkel is a required piece of equipment in the open water course. Below I’ll write about the two primary types of snorkels I believe are appropriate for scuba diving, and what I personally use. First I will discuss some of the reasons that having a snorkel is a good idea.

Here on Guam we are very fortunate to have many quality dive sites that can be dived from shore. It’s easier to find your descent point (the place you want to begin your dive) with your face in the water. That means breathing from a snorkel or your regulator. Although air consumption at the surface is minimal, that doesn’t mean that a diver doesn’t want to save all of their air for the actual dive!

Anyone who dives from a boat will likely find themselves at some point, coming up a distance away from the boat… not always by choice ๐Ÿ™‚ If seas are choppy or rough then keeping your mask on your face to avoid water in your eyes and something in your mouth to breathe with is a good idea! A snorkel in these conditions comes in handy while waiting for the boat to pick you up.

Lastly, you may end up surfacing away from the boat or your exit point and have a long surface swim back.

In my opinion (some might not agree) for scuba diving the choices are really between the traditional “J” type snorkels or the “Semi-dry” snorkels. A dry snorkel is great for snorkeling, but not so much for scuba diving (or even freediving) in my opinion. They generally work quite well at keeping water out. But, since it doesn’t allow water in, the snorkel is filled with air and therefore is buoyant underwater. This may pull the mask away from your face breaking the seal. They normally use some type of valve to keep water out and this is another failure point (If you purchase one of these types spend the money for quality). The mechanism at the top of the snorkel that keeps water out also makes the snorkel a bit more top heavy. Some people swear by them for snorkeling and if by “snorkeling” you mean floating on the surface and observing what’s below, I can understand that. Again, just my opinion, but I don’t like them for scuba diving.

For those reasons, I consider either the traditional J style or a semi-dry type to be the best choice. For both of these snorkels, you want to look for a comfortable mouthpiece made from silicone. Tubes can be from half an inch to an inch in diameter. The largest diameter is easier to breathe from but can be harder to clear. I personally own one of each type.

The traditional “J” snorkel, is basically just a tube in the shape of a J. These are the simplest design and what we all used when I first started snorkeling in the early 70’s. There have been a few improvements, mainly in areas like materials and comfort of the mouthpiece, but the basic idea remains unchanged. This is still the type preferred by many free divers and spearfishermen. They are very simple but require a certain amount of skill and practice to use. Swallowing seawater is no fun! Water can splash into the top and the water has to be blown out using your own lung power. There are two methods which are both taught in your Open Water course. There are both rigid and flexible types.

One innovation of this old design is materials. I have an Aqualung Nautilus Travel Snorkel made from soft silicone which rolls up, has it’s own case, and easily fits in a pocket. No purge valve or splash guard. This is the snorkel that’s normally attached to my mask these days when I’m teaching and shore diving in Guam. I saw this one in the shop after I came to Guam. I liked the compactness of it when it was rolled up so much that I bought it!

The Nautilus Travel Snorkel is a traditional design made up of soft silicone. It can be rolled up and put in a pocket making it readily available if needed.

The “Semi-dry” snorkel has a splash guard at the top which helps keep water out at the surface in the event of a wave or splash. This normally is accomplished in the form of slits or vents to divert water that splashes over the top. They don’t keep water out when fully submerged though so you will still have to clear it at the surface before using it. A purge valve at the bottom for water to drain out makes this easier. There is an area for the water to collect below the mouthpiece and a one-way valve there. Although this makes them much easier to purge, some would argue it’s a potential failure point. This is less of an issue for a snorkel than a mask in my opinion just due to the way a snorkel is utilized. I will say that I’ve had mine for years and it still works fine. The area between the mouthpiece and the tube that sticks out above your head is corrugated and flexible so that the mouthpiece will hang out of the way when the snorkel is not in use.

I’ve owned an Oceanic Pocket Snorkel for years. This one folds up and has a band to secure it. It’s not as compact at the Nautilus, but it still fits easily in a BCD or thigh pocket.

I really like both these snorkels. The semi-dry is definitely easier to purge and this is likely a factor to consider for a new scuba diver. The J type is normally less expensive if you purchase a traditional one. One like mine made from soft silicone so it can roll up is a bit more expensive.

I consider a snorkel to be an important piece of safety equipment. In a real emergency, in choppy seas, and with an empty tank and no boat in sight a snorkel could make all the difference. Although it’s never happened to me, it has happened to other people, so I think of it like insurance. Even when I take mine off my mask (for example when I’m diving in an overhead environment like a wreck penetration), I have a snorkel in one of my pockets if there is even a remote possibility of need.

Choosing a Mask

This post is aimed primarily at new divers and will be the first in a series on choosing equipment. It’s always a good idea to discuss equipment choices with your instructor. The retail staff at your local dive shop can be a big help as well. Hopefully this post will provide some things to talk about with them ๐Ÿ™‚ I’m going to share some thoughts I have about choosing a mask for diving. What to look for. What kind of choices are out there. Things to think about. Things to be aware of.

When it comes to dive gear in general, what’s most important is fit, comfort, and quality. It pays to buy quality and money spent on that will pay off in the long run. Dive equipment, in general, is built to last and as long as it’s properly cared for and serviced on a regular basis, it will give you years of service.

The first items that someone who is new to scuba diving will purchase are a mask, snorkel, fins and booties. Today we’re going to discuss masks.

Masks have come a long way from the high volume, black rubber, oval-shaped, mask that I started with back in the 70’s, but they all basically still do the same thing… They cover your eyes and nose, providing an air space so that we can see clearly underwater and equalize our ears. A mask is one of your most important purchases as a mask that is uncomfortable or a poor fit can ruin your dive.

Today’s masks come in different designs. You can get single or double lenses, side lenses, black or clear silicone. It should go without saying, but don’t buy a mask made from cheap rubber or PVC with plastic lenses. These are not suitable for scuba diving. 100% Silicone is the material of choice and lenses should be tempered glass. Choose a mask with a wide skirt (the part of the mask that seals against your face). This will create a better seal. Frames are available in a variety of colors.

Volume refers to the size of the airspace within a mask. Some will prefer the increased feeling of openness and greater peripheral vision of a high volume mask. Be aware though that these masks will require more effort to clear, especially when fully flooded. A low volume mask is easier to clear and seal to your face. I recommend staying away from purge valves. Some like them, especially for snorkeling, but I see it as a potential failure point.

Silicone is available in colored (opaque) or clear. Many divers prefer clear silicone (Some people might feel a little claustrophobic I’m told, although I’ve never experienced this myself). Someone who wants more peripheral vision can also opt for a mask with side windows. These are available in both single lens and double lens masks.

Photographers often prefer black silicone based on the theory that blocking light from the sides cuts down on glare and makes it easier to see through the viewfinder of a camera. Clear silicone can discolor over time, especially if stored with rubber. That doesn’t affect using the mask though, just the cosmetics. Both work well so it really boils down to personal preference.

Single lens masks are probably the most common and many people like them. One potential issue is that they generally have a smaller nose pocket, so fit can be an issue. If you feel any pressure at all on your nose when trying on the mask, then a double lens mask could be the solution. Double lens masks have room for a larger nose pocket. You really don’t notice the divider in the middle. No more than the divider in a pair of sunglasses. Your eyes will focus beyond that.

Then we have frameless masks. A single lens is joined directly to the silicone skirt. They are very low volume, lightweight, and flexible. This can be an excellent choice if you can find one that is a good fit.

Let me also mention a bit about coated lenses. Anti-reflective coatings are great for experienced divers. They reduce reflected light and increase transmission… what’s not to like? The problem (especially applicable to students, new divers, and instructors) is that a mirror effect resulting from the coating makes it difficult to see the eyes of the diver wearing the mask. Not being able to see the instructors eyes can be intimidating to students. Not being able to see a students eyes can be problematic for the instructor by making it more difficult to evaluate the students condition.

Now that we’ve discussed different kinds of masks, lets talk about fitting them. When looking at masks, most important is fit and comfort (also true of other gear we will talk about in future blog posts). Choose one that will fit your face and will provide a good seal without the strap. Push the mask against your face creating a vacuum. Make sure that you don’t have any of your hair breaking the seal. If the mask stays in place and no leaks are detected, then it should be a good fit. Without a good fit, the mask will leak!

While trying on the mask, once you’ve determined you have a good seal, then make sure that the mask skirt isn’t digging into your nose and feels comfortable around your upper lip and temples. Also be aware if there are any spots where you feel pressure on your nose or forehead, especially between the eyes. Make sure there is room.

Check that you are able to pinch your nose in order to equalize. If the nose pocket is too big you might have trouble. Now put the mask on fully with the strap. You should get a good fit with minimal strap pressure. Make sure the strap is sitting on crown at the back of your head and not on your ears.

The strap is there to keep the mask from being dislodged. Water pressure should be more than enough to seal the mask against your face if it’s a good fit. Tightening the strap to fix a leaking mask normally backfires and just makes the leak worse as a too-tight strap can distort the skirt!

Your mask will come with a silicone strap. You can replace this strap with a neoprene slap strap or cover that will fit over the silicone strap. You’ll find this to be more comfortable and it will virtually eliminate pulled hair.

Caring for your mask is important. Here are a few tips.

Once you’ve purchased your mask before using it the first time you will need to clean it. Agents used during the manufacturing process end up create a thin film on the lens of the mask. This causes it to fog quite easily. A paste toothpaste or liquid scrub can work. There are also products like Sea Buff, that are sold at most dive shops that will do the trick. Be sure to treat both the inside and outside of the mask lens. It may take more than one application. An old tip was to burn the film off. This is not recommended by manufactures.ย  Applying a lighter to the glass of a new mask to remove the film has been linked to weakening the lens, causing it to shatter. Using a lighter will void any warranty on the mask. Follow manufactures recommendations when it comes to cleaning.

Hold on to the mask box that your mask comes in. Rinse your mask in fresh water after use. Remember that bugs love silicone so once it’s dry put it away in its box! Keep it out of direct sunlight as much as possible. When it comes to defog a product like Sea Gold goes a long way. Some people use a solution of baby shampoo and a lot of the “old-timers” still just use spit ๐Ÿ˜‰

I hope these tips will help you find the perfect mask! Everyone has a unique face, so take your time and try on several masks. It will be time well spent.

Moving to Guam

I first thought about living in Guam after I made a dive trip here in December 2007. I was stationed in Japan at the time and I really enjoyed the trip and the diving. When it was time to transfer I tried to get orders to Guam. Unfortunately, I was one month shy of being able to do a full tour and had to return to the United States for my last tour before retirement. I was stationed in San Diego.ย  I did get to dive in California and Mexico as a result of that so it wasn’t all bad ๐Ÿ™‚

Those of you who follow my blog already know my story. How I decided a few years ago to sell everything and just travel full-time. You’ve also read about my visit to Guam and my trip to Chuuk last year.ย  How I decided to become an instructor 40 years after making my first scuba dive and to move to Guam to teach.

On the night of March 25th I flew out of Manila on a United flight bound for Guam.ย  Both United and Philippines Airlines have regular flights between Manila and Guam.ย  I arrived in Guam around 4:30 AM on Monday, March 26th. After passing through Immigration and Customs, I picked up my rental car from Alamo.ย  I ended up at Denny’s where I had some breakfast, used their wifi, and drank coffee for a couple of hours.ย  I decided around 7 AM to go for a drive. I still had a couple of hours to kill until I met my real estate agent at 9 AM.ย  ย 

I decided to see if I could drive around the island since I still had some time. The road traveled along much of the coastline and I was struck by the differences in water conditions. The Marianas Islands, including Guam, Saipan, and Tinian, lie upon the eastern border of the Philippines Sea. I noticed that the seas were relatively calm on the western side of Guam. On the eastern, Pacific Ocean side the waters were quite rough. It also explains why most dive sites are on the western side of the island!

Miyuki Atsuta from Ellen’s Realty was my agent. Decent low-cost apartments that were currently available it turned out were in short supply.ย  By Thursday I’d seen everything on the MLS that was relatively close to the area I wanted to live and was within the budget I’d initially chosen.ย The problem was availability! Everything that was currently available also had people on a waiting list. I had a chance at getting one of these apartments, but no one seemed in a hurry. One complex said there were six people in front of me and they were going down the list and waiting for people to get back to them. Another complex that my agent had submitted an application to before my arrival, we were also still waiting for a decision. He seemed in no hurry and given the demand I could understand why!

I was debating getting on a waiting list and then flying back to the Philippines until an apartment was available. After some thought I decided that I was going to have to increase my budget.ย  New apartments appeared on the MLS on Thursday.ย  I picked 4 of them to see on Friday and emailed Miyuki.

After looking at all four apartments I chose one in Asan based on it’s proximity to the dive shop.ย  It’s literally 2 minutes from Micronesia Divers Association in Piti where I will be teaching.ย  It’s less than a 15 minute drive to the Navy Base which is important to me as a retired Navy sailor.ย  Having easy access to the base for shopping, buying fuel, and using base facilities like the gym and swimming pools was important to me.ย  I’m also near the Navy Hospital where I will be getting medical care. My new apartment is a 500 square foot studio with an ocean view, a swimming pool and a great location! Miyuki did a great job and if you are looking for a place in Guam definitely give her a call!

Micronesia Divers Association Headquarters in Piti on Marine Corps Drive.

On Saturday, I rented a PO Box, paid my deposit for electric and scheduled it to be turned on Monday, then went by the apartment to finish paperwork and pick up my keys. On Monday, April 2nd,ย one week after I arrived, I moved into my new apartment.

My 2nd week in Guam was busy.ย  In between looking at apartments, I had been looking at vehicles.ย  Once I paid my deposits and knew I was staying, I’d found a vehicle at AutoSpot over the previous weekend.ย My salesperson was Jeri Miyasaki and she took very good care of me. I got a great deal on a 2006 Nissan XTerra. I picked it up on Monday.ย  Alamo Rental Car gave me a ride back to the auto dealership after I turned in my vehicle and didn’t even charge me!

It’s been a few years now since I’ve owned a vehicle… I needed something with a bit of room to haul dive gear around. 2006 Nissan Xterra.

I’d bought a bed at the Navy Exchange on base over the weekend and I picked it up on Tuesday.ย  I got that home and set up.ย  Monday night I’d slept in a beach chair… the bed was much more comfortable!ย  On Wednesday my high-speed internet, cable, and home phone were hooked up.ย  I’d gotten my cell phone service on Saturday.ย  I bundled all of this with GTA.

On Thursday, I went to the Social Security Office and ordered a new social security card.ย  I’d been told that an original social security card was required to get a drivers license.ย  I then went to get my business license.ย  I dropped off a copy of my business license, tax form, and my contract at Micronesia Divers Association.

I picked now to get sick with a pretty bad chest cold.ย  Obviously I wasn’t going to dive! I spent the weekend and the beginning of my third week in Guam mostly staying home trying to recuperate.ย  Later in the week I was feeling a bit better and stopped by MDA and bought two new tanks.ย  ย I’ll be writing about choosing a scuba tank in an upcoming blog piece.ย  I also had the chance to talk a bit with Eric McClure, one of the Course Directors, and with Lee Webber, who owns MDA with his wife June.

I’m finishing up my 4th week here now.ย  I was at the instructors meeting at MDA last Sunday.ย  I got a chance to get a look at the logistics a bit.ย  Where the classrooms are, the pool and how to schedule that for training, where to take students for open water shore dives, how to schedule boat dives, and a look at how everything works.ย  MDA runs a number of promotions to help bring in students and they give a lot of support to their instructors.ย  One of the reasons I chose them.

I worked on Friday, taking a diver from California who was in Guam on business, diving. The first client of my new business! That was a really enjoyable day! I took him to San Luis Beach and Gab Gab Beach and we had two nice dives.

Weekends at MDA have free beach dives. Anyone can show up and go for a dive. Parker Van Hecke and Kim Harris, long-time instructors at MDA lead the group. The Saturday morning dive this week turned out to be at Dadi Beach on the US Naval Base and was a nice dive. I tagged along and had an enjoyable morning! If you want to get an introduction to Guam dive sites that you can do from shore, this is the way to go. Dives are at 9 AM and 2 PM on Saturdays, and 2 PM on Sunday. Always a good idea to check with the shop ahead of time.

Currently, I have an Advanced Open Water class scheduled for May 2nd and an Open Water class for May 7th.ย  If you’re in Guam and interested you can sign up through MDA or contact me directly and I’ll take care of you. I’m also available for guiding and can set up private or semi-private lessons for you as well.

2018 has been a pretty good year so far.ย  I started with dives on New Years Day in Hawaii. I traveled to the Philippines the end of January and stayed until late March. Now I’m in Guam and looking forward to experiencing some great diving here along with introducing new people to the lifestyle I love.ย  It’s going to be an awesome year!

Back to the Philippines!

I flew out of Honolulu on Tuesday afternoon, January 30th (yes I’m way behind :)). I had spent most of January working on my MSDT (Master Scuba Diver Trainer) program, which certified me to teach an additional 10 specialties. I finished that up on Sunday, January 28th. Monday and Tuesday I ran around taking care of last minute errands. I mailed most of my books and instructional manuals to my friend Jason Cunningham in Guam along with some of my dive gear. I still had plenty of dive gear in the Philippines. I dropped my vehicle off at the same dealer that I purchase it from. I’d arranged for them to sell the vehicle on consignment (much cheaper to buy a vehicle to use for 3 months then sell it, than rent). I got a cab to the airport from the dealership. It was a much shorter flight to Manila than when I fly from Houston! I arrived in the evening on January 31st (after crossing the International Date Line).

On February 4th I met my friends Ron and Dennis from California at the airport. Since we were able to split the cost 3 ways we opted for a van to take us from the airport to Batangas Port (P3300/$65). There we caught the ferry to Puerto Galera.

I’d made the arrangements over a month previously. Dennis had just over 2 weeks. Ron would be in the Philippines for 5 weeks. I would stay until March 25th and then fly to Guam. We planned a week in Puerto Galera and a week in Malapascua. In Puerto Galera we would dive with Frontier and in Malapascua with Evolution.

After arriving in Sabang, we dropped off dive gear at Frontier and then headed to AAA Hotel. I’d had a few days to recover from jet lag. Ron and Dennis had not. Diving could wait until the next day.

I’ve written pretty extensively about Puerto Galera in the past so I will not rehash that now. We had a great week in Puerto Galera! Those of you who have followed my blog for a while know that I’ve spent a fair amount of time diving Puerto Galera. I’ve made over 80 dives there. We dived a relaxed pace that week completing 13 dives in 6 dive days including multiple dives at a few sites. Dive sites included Sinadigan Wall, Sabang Point, Hole-in-the-Wall and Canyons, Kilima Steps, Alma Jane, Sabang Wrecks, Boulders, West Escarceo, and of course a trip over to Verde Island.

I will mention one particular dive though. We were diving Canyons and got separated. Canyons is often a roller coaster of a dive due to strong currents and that day was no exception! On top of that visibility was probably not more than 30-40 feet as we’d gotten a fair amount of rain that week. I stopped to take a photo and when I looked up the rest of the group was gone! Fortunately we were already close to the end of the dive at this point. I went with the current expecting to catch up with them. I saw bubbles ascending and thought it was them but when I reached them (in the 3rd canyon) and was able to see the divers and not just their bubbles, it turned out not to be them. There’s a ship anchor, a very large one near the 3rd canyon where we normally start our ascent. With current running strong, it’s a good idea to re-group before starting the ascent. Since they were in front of me I expected either to catch them or they would be waiting there. I thought for sure they would be there waiting for me but when I arrived they were nowhere to be seen!

With me bringing up the rear they should have reached this point before me. I decided that someone must be getting low on gas and they had already started their ascent. After hanging on too the anchor long enough to scan the area, I let go and started my ascent. I lost sight of the bottom very quickly and my ascent and safety stop were in the blue. Up and down currents can happen in this area so it’s important to watch your depth.

When I reached the surface I did a 360 scan and there was no one there…nobody…. no boat… nobody… and of course the current was carrying me away from shore! Still, I wasn’t too worried. I was confident I could attract a boat as I had my Dive Alert with me and there is plenty of boat traffic in that area.

Less than a minute I saw an SMB hit the surface. Knowing that chances are better for a group than someone by themselves to be spotted, I started kicking towards it…. “against” the current I might add ๐Ÿ˜„ A few minutes later heads started popping up and it was the rest of the group! Unfortunately for me, it was up current from where I was!ย  It may have just been a hundred yards or so but, they had been at the surface for several minutes before I reached them… did I mention it was against the current? ๐Ÿ˜€ย 
We decided that because of the low visibility that I must have passed by them when I went to investigate the bubbles that turned out to be a different group of divers in the 3rd canyon. I’d ascended a bit letting the current carry me and they were hugging the bottom where it was likely a bit slower.I was trying to catch up after all so we could do our ascent together.
Now we’re wondering, where the boat is? I’m sure we’ve drifted well over a mile from shore by this point! We saw a boat quite a distance maybe a mile away. I warned the others that I was going to use my DiveAlert. For those who haven’t heard of them, it’s a device that attaches to your LP inflator hose and then to your BCD inflator. Your BCD works normally, but the DiveAlert can be used as a signalling device. Below the surface it makes a quacking noise. Above it’s an air horn…. a very loud one! They claim it can be heard a mile away and I can attest that it’s true!
After the first blast we could see people on the boat looking but they hadn’t spotted us. A DSMB may seem fairly large and bright, but from a mile away it really isn’t! After the second blast, the boat turned towards us and we were picked up. That was when we discovered they were looking for us! Our boat had developed engine trouble and had to be towed back. They quickly found another boat that could look for us.ย  Lucky as we could have been out there much longer until a boat came close enough for us to signal! As it was we still drifted a good half hour before we were picked up!

Ron and Dennis flew to Cebu on the 13th. I ended up skipping Malapascua. I was sick and wasn’t going to be able to dive. As it turned out, there were issues with the weather and they were stuck in Maya for 2 days because the ferries weren’t going over to Malapascua Island. I improved a bit then felt I was relapsing. I went to Manila for a few days then went to Medical City Clark to get checked out. I was diagnosed with a bacteriological infection and apparently, my arthritis was acting up in a big way! Antibiotics and a strong pain reliever and I was feeling much better the following week.

Ron and Dennis were finishing up Malapascua at the same time I was getting checked out at Medical City Clark. Dennis headed back to the US and Ron went over to do some diving in Subic Bay.

I caught up with Ron there although I didn’t dive. He told me he’d had a great time diving with Evolution in Malapascua. I wasn’t surprised as I’ve been diving with them for years. We visited the Bureau of Immigration office in Olongapo and extended our visas. After some discussion, we headed back to Puerto Galera.

We arrived back in Puerto Galera on February 28th. It’s high season and the only rooms that were available in our price range was the opposite end of Sabang from Frontier at Reynaldo’s. We really enjoyed Reynaldo’s which had a great view, good service and a good breakfast for a very reasonable cost. We would usually sit on the balcony in the morning and have breakfast. We had a really nice view of Sabang Beach.

The morning view from the top of Reynaldo’s.

We stayed there until the 8th and then transferred to AAA. When we arrived back in Sabang, AAA was fully booked. Reynaldo’s became fully booked on the 8th so we didn’t really have a choice about moving (welcome to the high season… there’s a reason I recommend booking ahead of time this time of year). AAA doesn’t have the view, but then it was also substantially cheaper!

There are some really good restaurants in Puerto Galera. El Galleon Resort, home of Asia Divers, has a great breakfast buffet and we went there a few times. We often had lunch either at Tamarinds, which wasn’t far from the dive shop and had a great view, or at Papa Freds Steakhouse which had some nice lunch specials. For dinner, there was Atlantis Resort which has great food and service and Captain Greggs, which is another restaurant on the beach with a great view. Cheaper and also good was Tina’s Restaurant which was just below Reynaldo’s on the waterfront.

My personal favorite restaurant in Sabang is Vesuvio’s. They have a brick oven and make what I consider to be the best pizza in the Philippines! The restaurant used to be on the main street leading up from the pier but moved late last year. Walk up the street from the pier and turn left at the laundry, just in front of Tropicana Restaurant. Then straight a couple minutes walk at most and you will find it on the left. The kitchen is downstairs and dining is upstairs. Great selection of pizzas and they will make a custom pizza for you if you like. They also have great pasta.

Meat Lovers Pizza from Vesuvios! I love the pizza here! A brick oven is really the ONLY way to make pizza ๐Ÿ™‚

We talked about going over to El Nido, but in the end, we opted to stay in Puerto Galera. One thing we had talked about doing that we had not done in February was rent motorbikes. They’re available for 500 pesos a day (around $10 bucks US). We made a visit to Tamaraw Falls and stopped and visited the ATM in Puerto Galera town on the way. The ATM at the bank in Sabang still does not accept debit or credit cards from foreign banks.

Ron left on the 12th but I decided to stay a bit longer not leaving until 18th. I took it easy and did only 11 dives. I ended up with only 24 dives this trip. Ron finished up with 50! Ron also became my first official student as a new scuba instructor. He completed his Advanced Open Water and Nitrox specialty.

As I finish this up I’m in my new apartment in Guam. I arrived on March 26th and I’ll write more about that and my plans here in my next post.

Diving on New Years Day

When I was living in Japan a few of us in the dive club used to always try to dive December 31st and on New Years Day. Finishing out the old year with diving and starting the New Year with diving… perhaps some people can relate ๐Ÿ™‚

I did a couple of training dives on December 31st with Brian Mara, one of the Course Directors at Dive Oahu (See my previous blog post). We were finishing up instructor specialties in Self-Reliant and DPV. Although I’d been in Hawaii for 2 months, it was the first time I’d gotten out on Dive Oahu’s boat, Anger Management. Anger Management is a 46 foot, Newton Dive Special. At 16 feet at the beam and with over 500 square feet of deck space there is plenty of room. It uses an open transom design making it very easy to enter and exit the water. There are plenty of snacks, soda’s, water, and hot cocoa or hot tea available to refuel with between dives.

Since I was doing training I’d left my camera behind that day. After we got back to the dock, I mentioned to Brian I would like to do a couple of dives on New Years Day and he told me no problem he’d get me on the boat. Later in the evening I received an email that I was booked for 7 AM. One of the nice things about doing instructor training with Dive Oahu is that we can go out on the boat whenever there is an opening and there usually is. I’d been so wrapped up getting ready for my instructor exam that I’d not taken advantage of this previously.

On New Years Day I was at the dock about 6:45 AM. I dropped off my equipment at the boat, then went and parked my vehicle. We waited for a few people who were running late (they had called) so the boat didn’t get underway until after 7:30. Once everyone arrived there was a final roll call, followed by the boat brief. As we left the harbor I looked to my left and could see the sun peaking up over Diamond Head. It was looking like a beautiful day with just a few clouds in the sky. We arrived at the first dive site about 15 minutes later.

I ended up with Chris Massie who helped out during my IDC while working on his IDC Staff Instructor certification. There were 4 people in our group. He gave a thorough dive brief as we headed to the dive site which was only about 15 minutes away. I’d neglected to inquire what dive site the day before and realized I had the wrong lens for the first dive. We were diving a wreck and I had setup with a 60 mm macro lens so although I got plenty of shots of life around the wreck, I don’t have any wide-angel shots of the wreck itself (Next time ๐Ÿ™‚ ).

After reaching the site, one of the divemasters (almost all the divemasters are actually instructors) went over to secure a line to the mooring buoy and check conditions. As it turned out it was near perfect conditions… no current and visibility was 90 feet+! Chris mentioned that there was often at least some current at this site so we felt pretty lucky!

The wreck we were diving is one of the most popular dive sites in the area. The YO-257 was a Yard Oiler of the United States Navy. She saw service in WW II, the Korean War, and the Vietnam War. The 1390 ton vessel is a 174 feet long and 33 feet at the beam. She could carry 200,000 gallons of fuel. She was sold for scrap in 1982 and after being purchased by Atlantis Submarines Hawaii, was reefed in 1989 off the coast of Oahu near Waikiki. The ship rests upright in a 100 feet of water. She was prepared for diving by having many large access holes cut throughout. Her main deck is at 85 feet. The bow section rise abruptly with a small deck at approximately 75 feet.

There is another wreck, the San Pedro, which is near enough that you can do two wrecks in one dive, but we found so much to keep us occupied that we spent the entire dive on the YO. Dive time started at 7:58 AM. My maximum depth was 99 feet as I went to the sand, but then worked my way back up and along the side just below the level of the main deck. The wreck was alive with fish. We spotted a couple of white tip reef sharks, including one inside the wreck itself. We saw a nice size moray eel too (they’re bigger than the ones I’m used to seeing in the Philippines). We also saw a few spotted eagle rays. Those who went over to the San Pedro saw 3 turtles. Because of the depth and being on air before we knew it our computers were telling us to go up. Dive time was 31 minutes. Water temperature was 71 degrees Fahrenheit.

After everyone was back on the boat and roll was called we untied from the mooring and headed over to the second dive site. From here I could see Point Panic. We again tied up to a mooring. Where we tied up was a site called Mid-Pipe. This is the Kewalo Pipe which enters near Point Panic, only here we were much further out. Kewalo Pipe is an old drain pipe that runs south out to sea. A lot of coral has grown up around it.

Our dive started at 9:12 AM. From where we tied up we kicked over to Secret Reef. Lot’s of fish and a turtle. Boxfish, butterflyfish, soldierfish, hawkfish, a nudibranch (Jorunna funebris), all the “usual suspects” ๐Ÿ™‚ After checking out Secret Reef we headed back to the pipe and made our way along it back towards the mooring line. There was another huge moray right at the base of the mooring line. Dive time was 42 minutes, visibility was probably 60-70 feet, water temperature was again 71 degrees, and maximum depth was 46 feet. Another nice dive ๐Ÿ™‚

Once everyone was back on the boat, roll was again called we untied from the mooring buoy, and headed in. Back at the dock I helped switch out tanks as the boat got ready for the next group. It had been a great morning ๐Ÿ™‚

I ended 2017 with a 147 dives. The first 2 dives of 2018 were in the log book! ๐Ÿ™‚ All in all it was a great start to the New Year! I’ve a feeling I will do a lot more dives in 2018 ๐Ÿ™‚

I hope everyone enjoys my blog ๐Ÿ™‚ If you do, why not take the time to subscribe so you never miss a post? Just hit the button at the top of the page. It will only take a few moments ๐Ÿ™‚

Until next time!

On Becoming a Scuba Instructor

When I originally travelled to the Philippines in October 2015 I planned to travel around the country for maybe 6 months and then move on to other parts of Asia for maybe another 6 months. After that I had a tentative plan to move to Guam and use it as a base to dive Micronesia. “Life” as they say, doesn’t always work out as planned ๐Ÿ™‚

I ended up spending 18 of the next 24 months in the Philippines. I would complete over 230 dives in those 18 months (at present I’ve made around 400 dives in the Philippines). I visited and dived in Moalboal, Subic Bay, Boracay, Malapascua Island, Puerto Galera, El Nido, Dauin, Apo Island, Panglao Island, Cabilao Island, Bauan, and Anilao. A few of these places I visited multiple times (read about many of them here on my blog). Along the way I made a lot of great memories! ๐Ÿ™‚

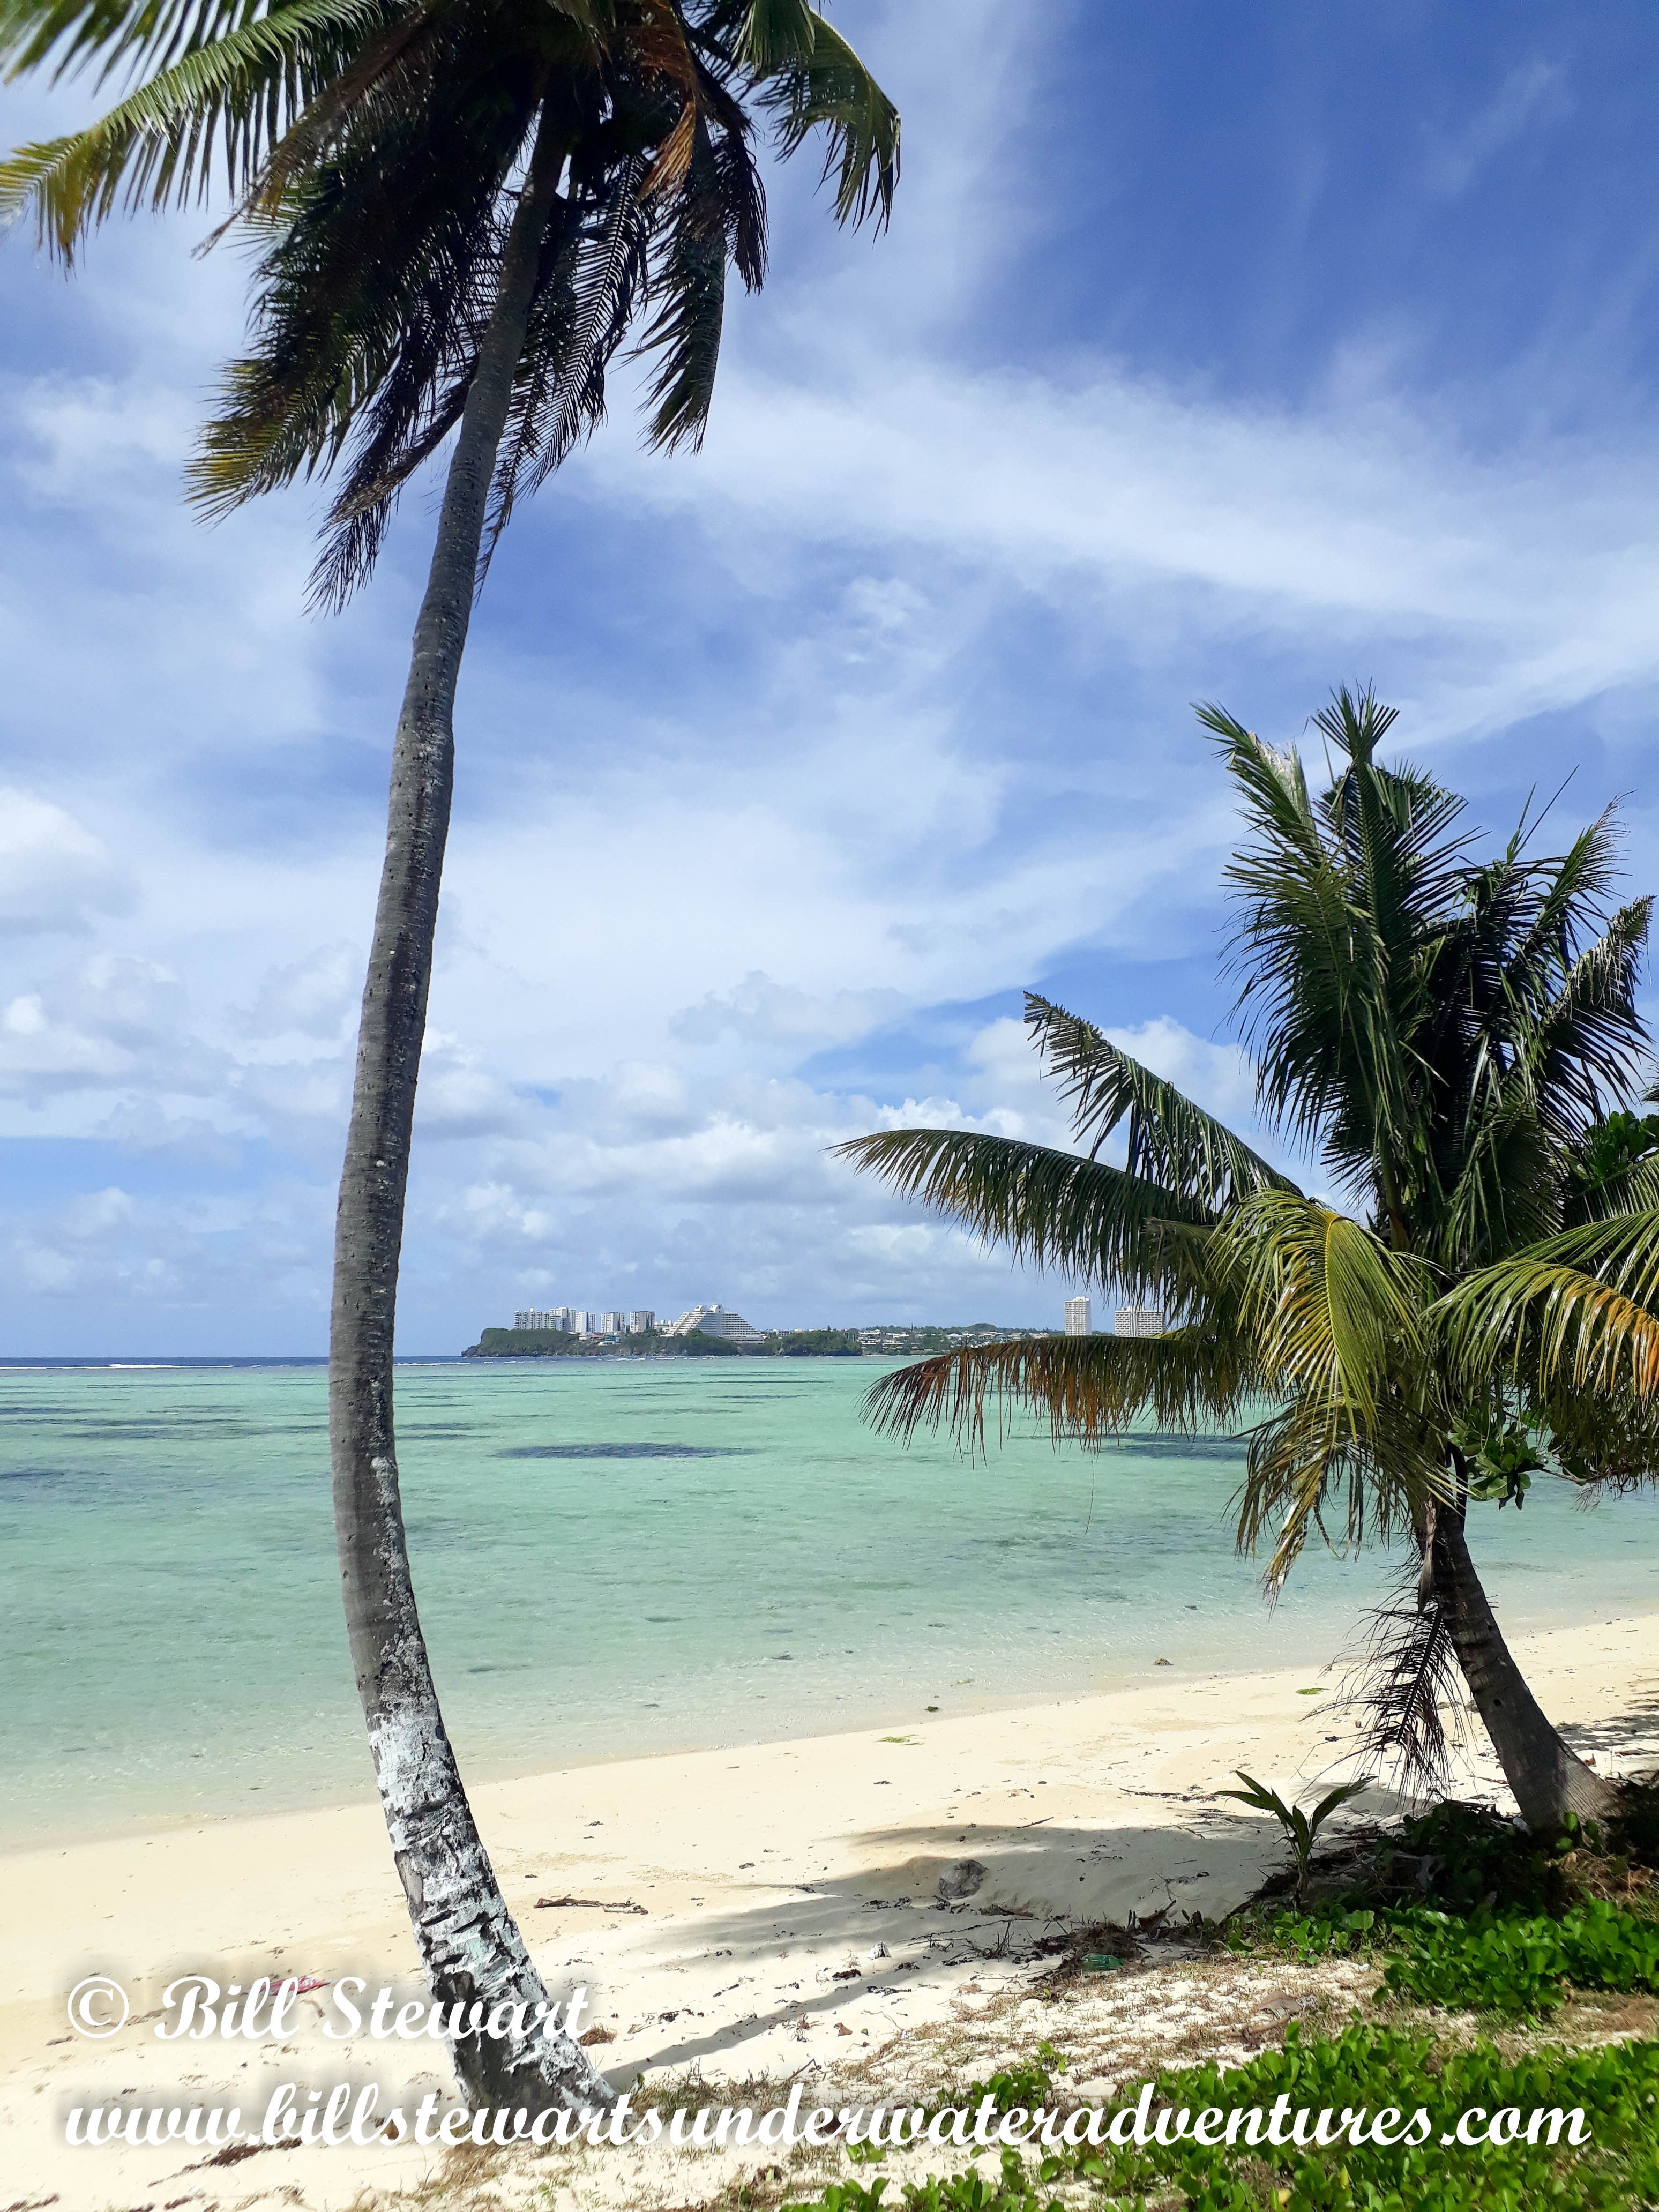
During my time in the Philippines in addition to the occasional trip home I had the opportunity to travel to one of my dream destinations. In June 2017 I traveled to the world-famous Chuuk Lagoon! (read about it here on my blog) I booked my trip to Chuuk through Micronesia Divers Association, based in Guam. To reach Chuuk, I needed to travel through Guam and it seemed a good time to check things out and find out if moving there was something I still wanted to do.

Initially it looked like maybe Guam was going to be a bit expensive for me. The prices on everything were a bit shocking at first. It makes sense when you consider how almost everything is imported… but still! I thought maybe I could afford to live there, but there wouldn’t be a lot left over to travel as much as I like. I was going to have to think some more.

During the week I was in Chuuk I had several conversations with Jason Cunningham and Greg Snell who both worked as part-time instructors at MDA. I eventually approached Eric McClure, who is the Course Director there, who told me “no problem” if I wanted to contract with them to teach. He understood that I would do my IDC somewhere else as their program wasn’t yet approved by the Veterans Administration. I’m fortunate to have educational benefits that I earned through my military service to pay for the course. Eric is retired from the US Air Force and understood that I would want to use those benefits. By the time I left Guam I certainly had a lot of food for thought!

The truth is that for a whole lot of reasons, I’d always said that I wasn’t that interested in becoming an instructor. I just wanted to dive! I think part of my concern was that I never wanted to reach a point where I would stop enjoying diving. I was worried that if it became a “job”, that some of the fun would go out of it for me.

I let all this percolate in my brain when I went back to the Philippines. In the end I decided that life is what we make of it. As much as I enjoyed scuba diving, why not share that with others? I decided that I could teach part-time and make enough money to live in Guam while still being able to travel and dive regularly. In July I went home to Texas and while there started to do a serious search for a place to do my IDC (Instructor Development Course). I corresponded with or spoke to people in Florida, Texas, and Hawaii.

I also did some diving of course, making a weekend trip to South Texas to dive the Texas Clipper, and another trip out to Florida. I made a decision in late August to do My IDC in Hawaii. I had a couple of months to kill while I waited for the IDC to start in November, so why not go diving ๐Ÿ™‚ On September 8th I flew back to the Philippines. I flew home again the last week of October for a week. Then flew to Hawaii. I arrived in Hawaii on October 31st.ย I initially stayed at a hostel. By the end of the week I’d found a studio apartment in Waikiki and purchased a used vehicle to drive for the 3 months I planned to be in Hawaii. I reasoned that I could sell the vehicle when I left and recoup some of my money at least and this would be much cheaper than renting a vehicle. Renting from one of the “Rent-a-Wreck” places was going to cost me over $2K! I bought a used 95 Toyota RAV4 for $1200 with the opportunity to recoup all, or at least a good chunk of it. Much better! My IDC officially started on November 6th.

The IDC I eventually chose was with Dive Oahu which is based at Joint Base Pearl Harbor-Hickham. Training was primarily with Course Director Scott Wilson with assistance from Course Director Brian Mara and Master Instructor Joshua Childress. Chris Massie who was doing his IDC Staff course was a big help also.ย Unsurprisingly, since I’d done my Divemaster in 2009 and had never worked as a Divemaster I was pretty rusty ๐Ÿ™‚ Obviously not when it came to diving, but when it came to “demonstration” quality skills (trust me it’s a LOT different than just doing it) I definitely needed to brush up! I also was quite rusty on Dive Theory so I spent a lot of time over the next several weeks reviewing that.

One thing I discovered the first night in the pool was in spite of what people might think… it gets COLD in Hawaii! With temperatures in the 70’s in the evening, after 4 hours in the water I discovered I did not have enough exposure protection! For a typical 1 hour dive I would have been fine, but water is a very good conductor of heat and I was shivering long before the end of the first pool session! I’d brought what I normally wear for diving in the tropics/semi-tropics. This gave me the equivalent of 2 1/2 mm from the waist down, my arms, shoulders and upper chest, and 5mm for remainder of my torso. After another 4 hour pool session and an open water training dive that approached 5 hours in the water I decided enough was enough! Less than a week after starting my course I bought a 5mm wetsuit. After the next pool session I was more than happy I did as it proved to be more than adequate ๐Ÿ™‚

Over the next 5 1/2 weeks we drilled and practiced in the pool, in open water, and in the classroom. We did classroom work in dive theory which included physics, physiology, dive equipment, decompression theory, diving environment, and dive skills. In the pool we learned not only how to demonstrate and teach, but also how to catch problems and mitigate risks when teaching students underwater.

The focus of the IDC is really on teaching and in every classroom session, pool session, and open water session we would be given assignments to teach. Scott and Brian proved to be tough graders and after every presentation we would receive constructive criticism and feedback on ways to improve. They would always start off with what we did well, but we knew the rest was coming ๐Ÿ™‚ The result was constant improvement as we moved through the course. I have to say that it was work. Some of it I enjoyed, but not all it was fun ๐Ÿ™‚ In the end though, it would payoff!

Classroom and Pool sessions were held at Joint Base Pearl Harbor-Hickam which I could make in 20-25 minutes depending on traffic. If I left too late it could take an hour or more during rush hour! Open water training was conducted either at Kaka’ako Beach Park (known locally as Point Panic) which is near Waikiki, or Kahe Point Beach Park, (locally called Electric Beach because of it’s proximity to a power plant). Since I’m staying in Waikiki Point Panic is quite convenient for me. Electric Beach takes about 35 minutes for me to drive too from Waikiki (early morning no traffic)

The first 3 weeks are actually the PADI Assistant Instructor course. We finished this up on November 26th. In addition to Assistant Instructor we were also certified as Peak Performance Buoyancy Instructors, Project Aware Instructors, and as AWARE Coral Conservation Specialty Instructors.

The Open Water Scuba Instructor portion started on November 27th and was officially over on December 15th. Our Instructor Exam took place over two days, December 16th and 17th. All the hard work paid off in the end. Preparation is key in many things and passing the PADI Instructor Exam is no exception.

The exam was held at a local high school which also had a swimming pool for the pool/confined water portion of the exam. The classroom had a number of tables with two chairs at each. Brian Phillips, one of my classmates in the IDC and I sat together. Scott Wilson our Course Director was there also to assist, along with Course Directors from other dive operations. Course Directors were not directly involved with their own students though. Ross Neil, the examiner from PADI, gave a briefing on how the exam would proceed over the next 2 days. First would be written tests on PADI Standards and Practices. Then another written test on Dive Theory. After finishing the written exams, we would have a break to prepare knowledge presentations. The “classroom” part of teaching. This would be followed by another break while we got ready to teach our confined water/pool assignment. We also had to demonstrate skills. That would be the first day. The second day we would meet at E-Beach where we would teach open water skills and perform rescue skills for grade.

I think one of the things that candidates stress over is that they don’t know what they are going to be required to teach until the day of the exam. You have to literally be prepared to teach anything that your certification qualifies you to teach! Preparation really is key when it comes to passing the exam. When we received our assignments Brian and I looked at each other, chuckled and said “no problem”! In the end all the preparation we’d received from our instructors at Dive Oahu paid off! We all pretty much breezed through the I.E. ๐Ÿ™‚

After completing the I.E. we completed Emergency First Response (CPR/First Aid) Instructor (a requirement for OWSI), and Care for Children w/AED Instructor with Brian Mara as the primary instructor with assistance from Scott.
PADI approved these along with my OWSI on December 21st.

The week between Christmas and New Years I worked with Brian Mara to complete requirements to be certified as an instructor in PADI specialties Digital Underwater Photographer, Project Aware Dive Against Debris, Self-Reliant Diver, DPV (Dive Propulsion Vehicles), and Equipment Specialist.ย Four of these courses required dives and I completed these over 2 days, December 30th and 31st

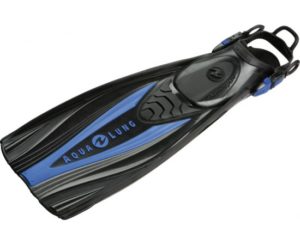
Obviously, I wanted to be able to teach underwater photography ๐Ÿ™‚ That was a natural specialty for me to choose to teach. There is some controversy about diving solo, but underwater photographers often feel like they’re diving solo anyway! Why not learn to do it safely. Hence, Self-Reliant. Project Aware is an organization that is doing great work in promoting protection of our marine environment. One of their projects is “Dive Against Debris” and it’s a very concrete way that we as divers can help improve our environment. DPV just looked like it would be fun (it was) and there are some practical applications in using them I found.

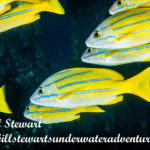
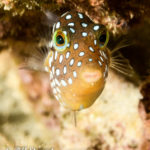
Here are a few shots taken for my instructor course for Digital Underwater Photography.

I’m currently working on the Master Scuba Diver Trainer Program which will certify me to teach an additional 10 specialties.ย  These include Boat Diver, Deep Diver, Drift Diver, Emergency Oxygen Provider, Enriched Air Diver, Night Diver, Search and Recovery, Shore, Underwater Navigation, and Wreck Diver.ย  We are scheduled to complete this program on January 28th.

I expect to be very busy the remainder of the month, but I will try to sneak a blog post in here and there when I have time ๐Ÿ™‚ Next time I plan to write about one of the great wrecks to dive on here in Hawaii, the YO-257.

Until next time ๐Ÿ™‚

Short visit to Puerto Galera

I arrived in Puerto Galera on September 27th and stayed until October 2nd.ย  ย I took my gear and dropped it off at Frontier Scuba. I’ve dived with Frontier my last 3 visits to Puerto Galera now.ย  This trip I stayed at AAA Hotel.Condo.Apartment.ย  I had a small studio and the rate was reasonable. I took the 28th off. I decided to just spend a few days in Puerto Galera as I’d just been there 6 months earlier.

I did 2 dives a day on the 29th, 30th, and October 1st. The first day I dived West Escarceo and Monkey Beach. On the 30th I dived Dungon Beach and Sabang Point. Finally on October 1st I dived West Escarceo once again and finished up with Sabang Wrecks.

As with my previous blog post about my last visit to Anilao, I’m going to add photos here and let them do the “talking” ๐Ÿ˜‰ For further information about diving in Puerto Galera I will refer y’all to my earlier blog posts from my previous visits there. Just type “Puerto Galera” in the Search box at the upper right hand corner of the page.

On October 2nd, I left Puerto Galera and headed back to Subic, where I often spend time when I’m not diving. I flew home to Texas October 22nd. After a week at home I flew to Hawaii arriving on October 31st. I started my IDC on November 6th. Those of you who follow me on Facebook may already have seen a few photos ๐Ÿ™‚ I’ll be writing a bit about the IDC in my next blog post ๐Ÿ™‚